Master using crash pads effectively in bouldering for safe landings & injury prevention. Learn placement, coverage & techniques!
Bouldering, a pure test of strength, can feel like flying, until the ground rushes up. Using crash pads effectively becomes the difference between walking away and not. They’re more than just cushions; they’re your safety net. Placement matters.
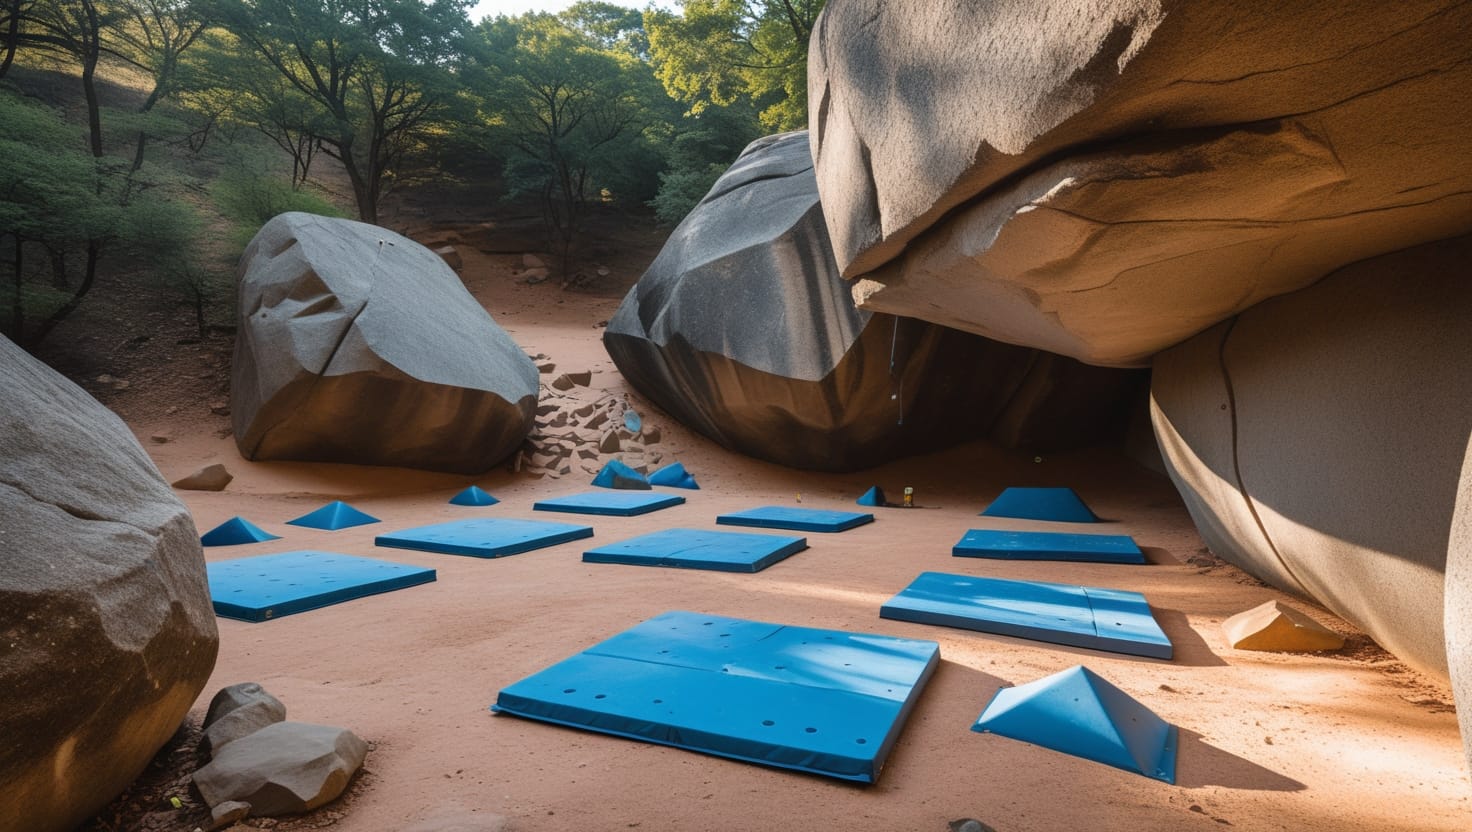
One must consider the fall zone. (This zone it’s typically wider than people think.) Consider where you’re most likely to land based on the climb. Overlapping pads eliminates gaps; a twisted ankle is no fun. For a highball problem, consider layering pads. More height requires more protection; it’s simple math.
A crash pad isn’t invincible. Inspect it for tears. Close zippers. Don’t drag it across rough ground. A little care extends the life. Bounce-test the landing zone before you climb. (It is worth the effort.) A firm, even surface absorbs impact better. Keep reading to learn how to position them properly for specific climbs.
Key Takeaway
- Position crash pads carefully to cover all fall zones.
- Use multiple types of pads for better protection against falls.
- Regularly check and maintain crash pads for safety.
Proper Placement
Identifying Fall Zones
Knowing where you’re likely to fall is half the battle, maybe more. Climbers need to scout before they climb. It isn’t just about seeing the holds, it’s about predicting the possible drops.
There are zones to consider:
- Initial Drop Zone: Where gravity takes hold right off the ground. The first few moves, deceptively tricky.
- Transition Zone: The crux. (That’s climbing talk for the hardest part.) Expect to peel off here.
- Top-Out Zone: Reaching the summit, almost there; don’t blow it. Landing properly is still key.
Crash pad placement isn’t guesswork. Pad placement is based on these zones to maximize fall protection. Prioritize the transition zone. It’s where most climbers fail. Positioning pads here provides crucial protection. This adds confidence. That confidence can help send the problem. Don’t forget the initial zone. A slip near the start can still lead to injury. High boulders require extra attention at the top-out.
Strategic Positioning
It isn’t enough to just throw a pad down. Where a climber lands and where they think they’ll land can be two different things. It’s physics, plain and simple. Pad placement should account for trajectory.
Strategic positioning needs planning:
- Overhangs: Falls aren’t straight down. Pads need to extend further to catch backward momentum. Picture an arc.
- Slab Climbs: Angle matters. Align the pad with the slope of the rock to avoid awkward landings.
- Crux Moves: This calls for the big guns. Thicker, denser pads offer maximum impact absorption where falls are most likely.
Knowing where the center of gravity will be is the key. Don’t just put the crash pads under the holds. A little foresight can mean a safer fall. Properly positioning pads boosts confidence. That little bit of extra confidence can affect performance. More than a few climbers send harder when they feel secure.
Maximizing Coverage and Safety
Credits: Climbing Tech Tips
Seam Management
Seams are the enemy, those little lines of doom between pads. Miss one and you’re flirting with a twisted ankle, or worse. Managing seams, a necessary evil.
Here’s what works:
- Overlap Pads: It isn’t about touching. Overlapping creates a continuous surface. A few inches can make all the difference.
- Use Accessory Pads: These are the gap fillers. Small, portable, ankle-savers. Perfect for uneven terrain or odd angles.
Seam management is more than just aesthetics. It is about creating a smooth, predictable landing zone. A smooth landing zone minimizes the risk of injury. Pay attention to the small details, those seams. This can prevent a big problem. Smooth landing zones are key to safe bouldering.
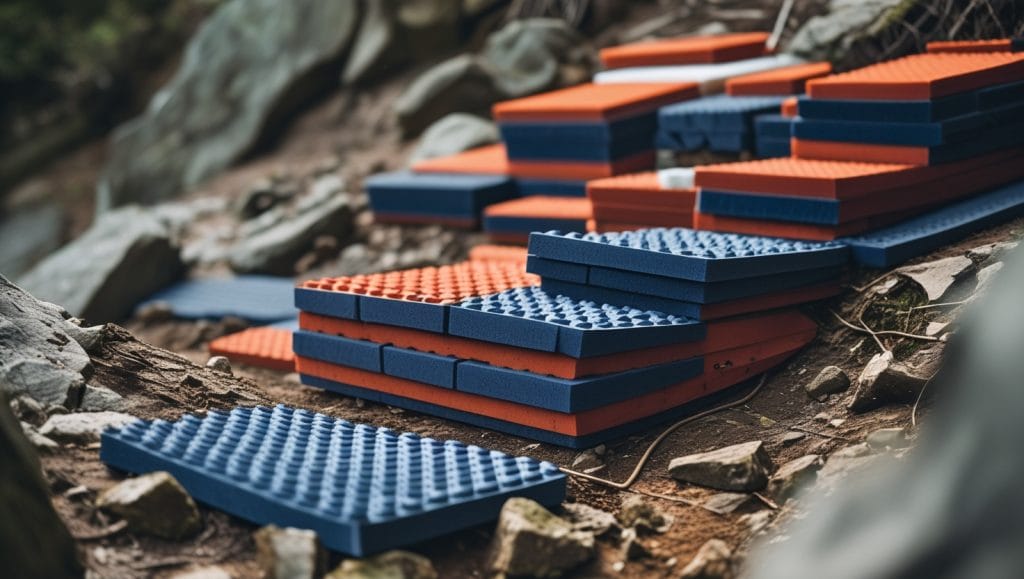
Stacking Techniques
Height changes the game. So does uneven ground. More height means more force upon impact. Uneven ground means unpredictable landings. Stacking crash pads offers a solution. It gives extra cushioning where it’s needed most.
Stacking techniques:
- Stack for High Risk: Under the crux, under the dyno, under anything that feels like a controlled freefall, stack multiple pads. Extra pads equal extra protection.
- Combine Foam Types: Thin pads on top, thick pads on the bottom. (This is the common way.) This creates a progressive absorption system. Thick pads absorb the initial impact. Thin pads cushion the rest.
Stacking pads isn’t just about adding height. It is about customizing the landing zone for specific risks. A well-stacked pad setup softens the blow. Stacking pads makes bouldering safer. Safe bouldering lets climbers push their limits.
Accessory Pad Use
Big pads are great, but sometimes it’s the little things that count. Accessory pads, the unsung heroes of the bouldering world. Small, versatile, and often overlooked. These pads are lifesavers.
Uses for accessory pads:
- Filling Gaps: Those pesky seams, those ankle-twisting voids. Accessory pads bridge the gap. Problem solved.
- Protecting Ankles: Uneven ground is a given. Rocks, roots, divots. Accessory pads level the playing field.
- Covering Small Hazards: A sharp rock hidden under a larger pad. A rogue root sticking out. Accessory pads provide a buffer.
They aren’t the main event. Accessory pads provide essential support. Placed carefully, they turn a potential hazard into a safe landing. A safe landing is key to confident climbing. Accessory pads increase confidence. Accessory pads improve safety.
Safety Considerations
Spotting
Crash pads are important. A good spotter is the next line of defense. They can guide a falling climber toward the safest landing. Spotters are the silent guardians of the boulder field.
Effective spotting looks like:
- Direct Falls: It’s about guiding. The spotter doesn’t catch. They redirect the fall toward the pad. The focus is on safe landing.
- Training: Knowing how to spot is crucial. The spotter needs to protect themselves, too. A sprained wrist helps no one. [1]
Spotting is communication and awareness. The climber and spotter must be on the same page. (Hand signals are your friend.) A trained spotter minimizes the risk of injury. A good spotter maximizes confidence. Confidence lets climbers try harder things. It allows them to climb at the highest level.
Regular Maintenance
Crash pads aren’t immortal; they need care. Like any gear, pads degrade over time. Regular maintenance extends their life and ensures they work when needed. Don’t neglect the investment.
Maintenance means:
- Foam Condition: Feel for soft spots. Look for tears. Foam that is overly compressed loses its ability to absorb impact.
- Cleaning: Dirt and grime degrade fabric. Wipe down the pads after each use. Keep them clean.
- Proper Storage: Don’t leave them folded for long periods. Store them flat or hanging to maintain shape.
A little attention goes a long way. (Think of it like changing the oil in your car.) Regular check-ups ensure the crash pad performs as intended. Working crash pads are the bedrock of bouldering safety. Safe bouldering extends climbing careers. Don’t skip maintenance.
Environmental Impact
Bouldering leaves a mark, even if we don’t see it. Foot traffic wears down the ground. Trampled vegetation damages the environment. Using crash pads thoughtfully minimizes this impact.
How pads help the environment:
- Reduce Foot Traffic: Pads provide a designated landing zone. Climbers (and spotters) tend to stay on or near the pads, reducing the area impacted by feet.
It is about respecting the rocks and the land. Minimize erosion by staying on established trails. Pack out all trash. Leave no trace. Let’s keep these areas pristine. (Future generations will thank us.) Conscious use of crash pads is one step in preserving our climbing areas. Preserved climbing areas mean more adventures for everyone.
Advanced Techniques
Creating a Level Landing
The ground isn’t always cooperative; sometimes it’s downright treacherous. Uneven terrain presents a challenge for crash pad placement. (Rocks, roots, holes—the list goes on.) Creating a flat landing zone is crucial. It’s about leveling the playing field, literally.
To flatten a landing zone:
- Use Multiple Pads: Cover the unevenness. Spread them out to create a wider, more uniform surface.
- Strategic Stacking: Think Tetris. Stack pads carefully to compensate for ground irregularities. Fill gaps. Build up low spots.
A level landing minimizes the risk of twisting an ankle. It reduces the chance of landing awkwardly on a rock. Prioritizing a flat landing area is about minimizing risk. Minimizing risk increases confidence. Stack pads carefully and protect the ankles.
High Ball Problems
The higher you go, the harder you fall, that’s the simple truth of highball bouldering. Taller boulders demand extra respect. Extra protection is key for safe ascents. Highball climbs mean high-stakes landings.
Strategies for highball climbs:
- Larger Landing Areas: Don’t skimp. Use more pads. A wider landing zone accounts for unpredictable falls. Cover as much ground as possible.
- Thicker Pads: Stack multiple pads. Use the thickest pads available. Maximize cushioning to absorb the impact. [2]
Highball climbs are not for the faint of heart, they require preparation and caution. The right crash pad setup provides a margin of safety. A margin of safety boosts confidence. Confidence enables climbers to push their limits, while being safe.
Final Checks
The climb looks good. The pads are placed, now what? Before committing, a final check is essential. It’s a quick but vital step. Don’t skip it. Peace of mind is worth the effort.
Final checklist:
- Jump-Test Stability: Bounce around. Feel the landing zone. Make sure it’s solid and stable. Adjust as needed.
- Check for Gaps: Run your hands along the seams. Make sure there are no hidden gaps. Patch them up.
- Accessibility for Spotters: Can they move freely? Are they positioned to guide a fall? Clear any obstacles.
A few moments of preparation can make all the difference. Ensuring the pads are secure means ensuring the safety of the climber. Safety enables focus. Focus enables sends. Prioritize safety checks, every single time.
FAQ
How should I position crash pads for effective fall zone identification?
When setting up your crash pads, start by carefully identifying the fall zone – where you’re most likely to land if you come off the boulder. Position your main pad directly under the crux moves or highest points of your climb.
For traverses or problems with uncertain sequences, you’ll need to assess the entire potential landing area and adjust pad placement accordingly. Watch climbers on the problem first if possible to see where they typically fall. Remember that proper crash pad positioning is your first line of defense against injuries.
What’s the best way for managing seams and minimizing gaps between pads?
Seam management is crucial for safe landings. Always overlap your pads rather than placing them edge-to-edge to avoid creating dangerous gaps that could catch a foot or leg. When stacking crash pads, offset the upper pads to cover seams in the layer below.
For complete protection, use slider pads or accessory pads to cover any remaining seams between larger pads. Communication with climbing partners about pad placement helps ensure all potential landing areas are covered and that pads won’t shift apart during falls.
How should I use thicker foam placement and create flat landing zones with crash pads?
Place thicker foam sections directly under the most likely impact points for higher falls or crux moves. For uneven terrain adjustments, use your thickest pads on the rockiest or most uneven ground.
Create flat landing zones by strategically layering pads – use thinner pads to fill depressions and thicker ones to cover rocks or roots. On severely uneven ground, start with a base layer of pads to create a more level foundation, then add additional pads on top for cushioning.
What are some techniques for landing surface preparation on uneven terrain?
Preparing your landing surface properly is essential, especially on uneven terrain. Remove loose rocks, sticks, and debris from under and around your pads. For particularly rough areas, consider using layers of thin foam first to create a more stable base before adding thicker pads on top.
When dealing with talus or boulder fields, prioritize covering pointy rocks and filling gaps between larger rocks. Test your landing zone by stepping firmly onto the pads before climbing to check for shifting, rocking, or other instability issues.
How can I protect dynamic moves and properly redirect momentum during falls?
When protecting dynamic moves, position your crash pads to cover a wider area than you might initially think necessary. Dynamic movements often result in less predictable falls. Consider your center of gravity and assess the vector analysis for fall trajectory – if you’re making a big move right, you’ll likely fall right if you miss.
For redirecting momentum during falls, learn to “wet noodle” – stay loose and roll with the impact rather than landing stiffly. Train yourself to fall sideways rather than straight down when possible to distribute impact across more surface area.
What’s important to know about using accessory pads and protecting sit starts with satellite pads?
Accessory pads usage adds crucial protection in key areas. Use smaller accessory pads to protect ankles on uneven ground, cover dangerous rocks outside your main landing zone, or fill in gaps between larger pads.
For sit starts, place satellite pads strategically around your starting position to protect your back, tailbone, and elbows if you fall backward during the initial moves. These smaller pads are also perfect for covering cracks and obstacles that might be missed by larger pads. Keep a few accessory pads handy for quick adjustments as you discover hazards.
How should I ensure crash pad stability and test landing zones before climbing?
Ensuring crash pad stability on uneven ground requires careful setup and testing. Start by testing landing zones before climbing – jump or step firmly onto each pad to check for rocking or sliding. For maximum stability, look for flat spots to place pad corners, or create them by moving small rocks.
When stacking crash pads, use a wider base pad and narrower top pad to improve stability. Jump-testing pad stability and cushioning before attempting difficult moves can save you from nasty surprises. Always communicate with climbing partners about any stability concerns you identify.
Conclusion
Crash pads are essential for safe bouldering. Prioritize proper placement, ensuring complete coverage under the intended fall zone. Regularly inspect pads for damage and address any issues promptly.
Employ spotting techniques when possible. Communicate clearly with your climbing partners about potential fall paths. Remember, a well-placed and maintained pad significantly reduces injury risk, allowing you to push your limits with confidence. Prioritize safety and enjoy the climb!
References
- https://scripts.mit.edu/~mitoc/climbing-wall/operatingmanual.pdf
- https://www.outdoorgearlab.com/topics/climbing/best-bouldering-crash-pad/how-we-test