Learn important grip terminology and techniques to enhance your bouldering skills and stay safe while climbing.
Grip terminology stands as the basic language of bouldering. Each hold type demands specific hand positions – crimps grip tiny edges with bent fingers, slopers need open-palm pressure on rounded surfaces, and jugs allow full-hand wraps for maximum security. Pinches require thumb opposition, while pockets fit one to three fingers inside small holes. (1)
These terms might sound strange to newcomers, but they create a map for reading routes. Proper grip knowledge prevents injuries too, since different holds need different approaches. Understanding these fundamentals makes the difference between safe climbing and potential mishaps on the wall.
Key Takeaway
- There are different types of grips used in bouldering.
- Knowing these grips can help you climb safely and efficiently.
- Training with various grips builds strength and skills.
Full Crimp
The full crimp is a challenging yet rewarding grip for climbers. Here’s what makes it unique and how to use it wisely:
- Grip Description: The full crimp involves gripping a small edge with your fingers bent at a 90-degree angle. Your thumb locks over your fingers for added power.
- Benefits: It’s a powerful grip that helps climbers pull themselves up challenging routes.
- Risks: The position strains the tendons and ligaments, especially in your fingers. Overuse or improper technique can lead to injuries like tendonitis or pulley tears.
- Advice:
- Warm up your fingers before attempting the full crimp.
- Focus on technique, ensuring your thumb is engaged.
- Take breaks if you feel pain in your fingers or forearms.
- Build finger strength with hangboard training and rest between sessions.
Using the full crimp wisely will help you climb safely and effectively.
Pinch Grip
Credit:By Short Guys Beta Works
When you first start climbing, the pinch grip may seem simple—squeeze a hold between your fingers and thumb. But as you get into bouldering, you’ll realize it’s essential, especially for larger holds. To excel in climbing, you need to train your pinch strength. Pinch strength involves force and control, with your thumb playing a key role as a stabilizer. It may feel challenging at first since it targets smaller muscles not used often in daily life.(2)
Here are some effective methods to train your pinch grip:
- Pinch Blocks: These are great for strengthening your pinch. Start with narrow blocks and increase the width as you progress.
- Fingerboard Training: Use a fingerboard with pinch-specific holds to mimic bouldering moves.
- Pinch Holds on a Wall: Look for bigger, flat holds to practice pinching during bouldering.
- Grip Strengtheners: These can help with extra thumb and finger training.
Over time, your thumb and fingers will become stronger, giving you more confidence on bigger holds.
Sloper
Slopers are deceptively tough—smooth, rounded holds that require more than just a grip.
- Body tension is key. You can’t rely solely on your hands.
- Feet play a larger role than expected. Trusting your feet helps you stay grounded and balanced.
- Sweating can be an issue. When palms become slick, it adds pressure.
- No standard holds. Slopers don’t offer pinches or crimps, so you rely on palm contact, arm engagement, and core strength.
- Core stability is essential. If you’re not engaged, you’ll slip.
- Control over strength. Slopers require technique more than raw power.
To improve:
- Use your feet more than you think.
- Engage your core for stability.
- Keep your body close to the wall for better friction.
- Focus on technique over grip strength—chalk helps but isn’t a fix.
The more you practice, the more you’ll adapt and finesse your movements.
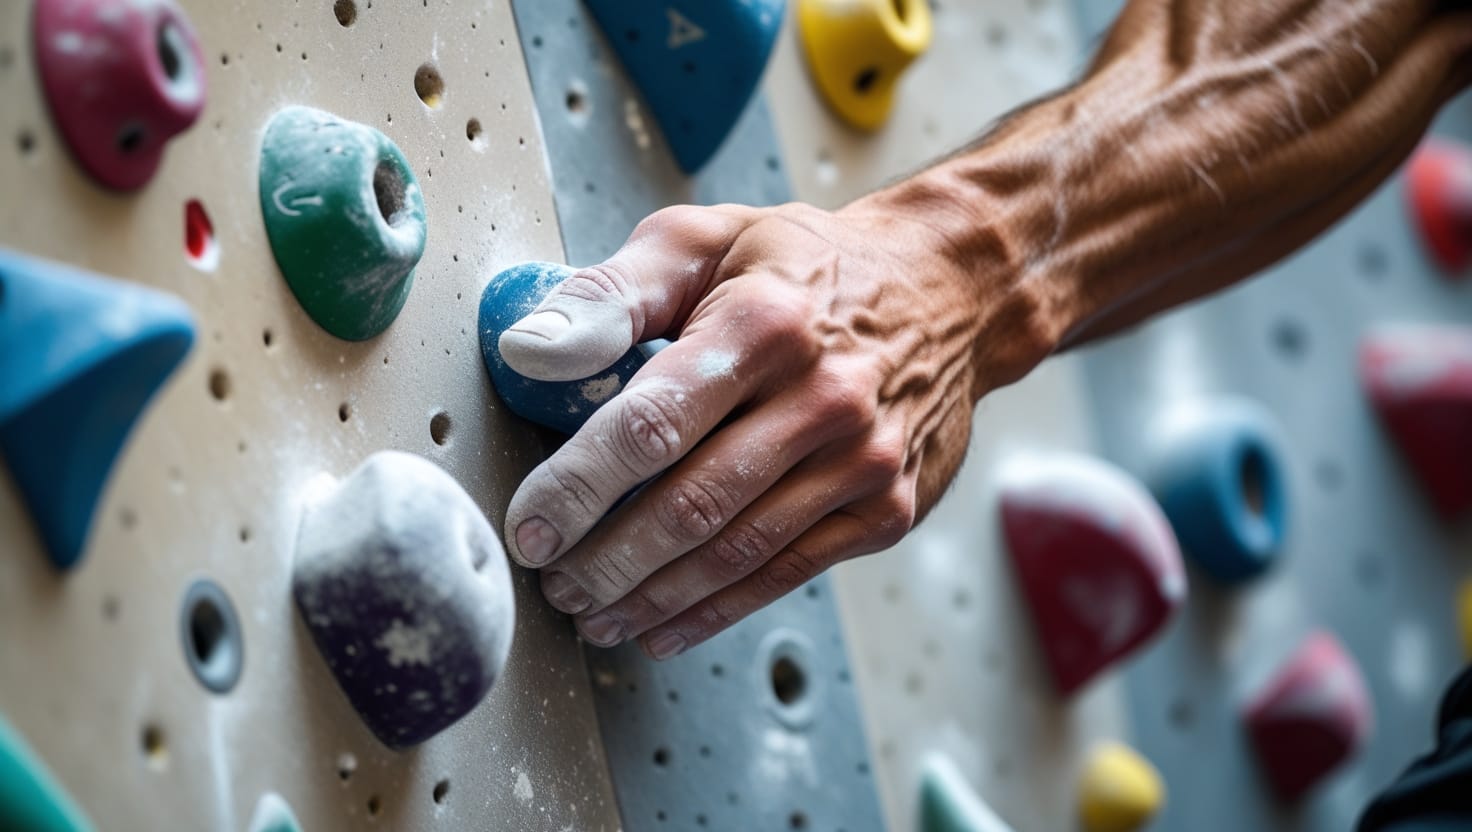
Crimp
The crimp grip is a powerful and common way to hold small rock holds. Here’s how it works:
- Curl your fingers tightly and place your thumb over the top, pressing down.
- The grip creates tension, with the entire hand engaged, not just the fingers.
While effective, this grip can strain your joints. The sharp angles at which your fingers bend pull tendons in ways they aren’t used to. Repeated use can lead to soreness, especially after tough climbs with tiny crimps.
Over time, this stress might result in tendonitis or pulley tears.
To prevent injury:
- Mix up your grip choices—use open-handed holds or pinch grips when possible.
- Stretch and warm up your fingers before climbing.
- If sore, take a break and let your hands recover.
Don’t hesitate to ask more experienced climbers for tips on improving form and reducing strain.
There’s a special kind of magic when you find a pocket. It’s not just a hold for your phone, but a space in a rock wall that invites you to try something new. You test it by sliding your fingers in, hoping they’ll fit.
Pockets require strength, technique, and determination. The first time you use one, it’s tricky. You’ll feel cramped, but with effort, something clicks. To grip a pocket properly, focus on:
- Grip: Use your thumb and index finger to squeeze the pocket’s edges.
- Flexibility: A shallow pocket is hard to fit into; a deep one lacks leverage.
- Pressure: Small pockets strain your muscles, so managing tension is key.
Your body positioning also matters. Stand correctly to distribute weight and ease the load on your fingers. It’s not just about strength; technique makes all the difference. With practice, you’ll master pockets and approach each one confidently.
Undercling
Underclings—any climber who’s tackled a tough problem knows the feeling. Gripping a hold below, pushing against the rock, and using every ounce of strength to pull up—it’s a muscle-burning, arm-shaking experience.
When facing an undercling:
- Body Positioning: Don’t just pull. Position your body to use your legs and core. Keep your hips close to the wall.
- Grip Strength: It’s about holding your position, not just pulling. Your fingers lock in, but your arms do most of the lifting.
- Footwork: Your feet matter. Position them right to give yourself stability and keep your body close to the rock.
Physically, the undercling demands a lot. The forearms, shoulders, and core take over as you push yourself up. Timing is key—push at the right moment or you won’t make it. It’s not just muscle; it’s technique, using the whole body to work together.
Sidepull
A sidepull might seem simple—a sideways pull on a climbing hold—but there’s more to it.
- It’s like opening a stuck door, but you can’t use your whole body.
- Foot placement is key, and without it, you’ll waste energy.
- Feet should push and stabilize your body, creating leverage.
- The hold is often at shoulder height or higher, so positioning matters.
Proper footwork is crucial:
- Your closest foot to the wall should anchor and push against it.
- The opposite foot should help balance and push you into the wall.
- Core engagement is essential to prevent twisting away from the wall.
It’s not just brute strength.
- Keep elbows bent for control.
- Trust your feet and make small adjustments when necessary.
Once you figure out the right positioning, the climb will feel smoother.
Gaston
Climbing feels like a puzzle, with every move requiring strategy and technique. Strength alone doesn’t solve it, and the gaston grip is a great example. At first, it felt awkward, like stretching too far. The gaston requires rotating the hand with the thumb down and the palm outward, engaging the chest, arms, and back all at once.
To perfect it:
- Shoulder stability is crucial. Keep the shoulder engaged to prevent rolling forward, stabilizing the joint.
- Engage your back muscles for a full-body push. It’s a coordinated effort between your back and arms, not just arms alone.
- Start with bigger holds to get used to the movement. Once comfortable, move to smaller grips.
- Watch for joint strain. Avoid pushing through pain by adjusting when you feel tension.
Mastering the gaston was a turning point. It taught that climbing isn’t about brute force but balance, technique, and muscle engagement.
Importance of Grip Training
Training with different grips is essential for climbers. It’s not just about strengthening hands and arms, but improving overall body strength. Each grip activates different muscle groups:
- Crimp: Targets finger flexors and forearms.
- Open-hand: Works fingers with less strain on joints, focusing on endurance.
- Pinch: Engages thumb and forearm, crucial for certain holds.
- Lock-off: Builds strength to hold body weight with one arm mid-move.
Incorporating grip exercises like pinch blocks, finger rolls, and dead hangs is key for injury prevention. Overusing one grip can cause muscle imbalances, leading to overuse injuries like “climber’s elbow” or pulley tears.To avoid injury and build balanced strength, mix grips during training. Focus on strength and injury prevention by using varied grips. Listen to your body, rest when needed, and warm up properly.
Conclusion
Grip mastery stands as a fundamental skill in bouldering. The basic grips include full crimp, pinch, sloper, crimp, pocket, undercling, sidepull, and gaston – each serving specific purposes on the wall. Climbers build finger strength through regular practice with these grip types (typically using hangboards or campus boards). The right grip selection makes routes more manageable, while poor choices waste energy. Training these grips leads to smoother, more efficient climbing movement.
FAQ
What’s a crimp, and why do climbers talk about it so much?
A crimp is when you grab a tiny hold by bending your fingers at their middle knuckles while keeping the fingertips pressed against the rock. Think of it like hanging onto a thin book shelf with just your fingertips. Climbers use crimps all the time because many climbing routes have these small edges as their only holds. While it’s super effective for gripping small holds, it also puts a lot of stress on your fingers, so you’ll want to build up to it gradually.
What makes a sloper different from other climbing holds?
A sloper is exactly what it sounds like – a sloping surface without any defined edges to grab. Picture trying to palm a basketball or hold onto a smooth dome. These holds rely on friction and body positioning rather than your fingers’ strength. You’ll get the best grip by keeping your arms straight and using your body weight to press down into the hold. The success of grabbing slopers often depends on conditions like temperature and humidity.
How do you use a pinch hold properly?
Pinch holds work just like picking up a book by its spine – you squeeze the hold between your thumb and fingers. They come in different sizes, from wide blocks that need your whole hand to small pinches that only fit a couple of fingers. The key is generating force with your thumb in opposition to your fingers. You’ll find pinch holds on both vertical walls and overhanging routes, and they’re great for building grip strength in your thumbs.
What’s the difference between an open hand grip and a closed crimp?
An open hand grip keeps your fingers in a more relaxed position, like you’re holding a baseball, while a closed crimp involves folding your fingertips down and possibly wrapping your thumb over them. Open hand grips are gentler on your tendons and joints, making them perfect for training and everyday climbing. Closed crimps give you more power but come with a higher risk of injury. Most experienced climbers switch between these grips depending on the hold.
Why do climbers use chalk, and how does it affect different grips?
Chalk keeps your hands dry and improves friction between your skin and the holds. It’s especially crucial for slopers and volumes where friction is everything. On crimps and pinches, chalk helps prevent sweat from making your grip slippery. The amount you need varies based on your natural hand sweatiness and the climbing conditions. Too much chalk can actually make holds slippery, so you’ll want to find your sweet spot through trial and error.
What’s a gaston, and when should you use it?
A gaston is when you grab a hold with your palm facing outward and your thumb pointing down, like trying to pry open an elevator door. You’ll often use this grip when holds face away from each other or when you need to create opposition with another hold. While it might feel awkward at first, gastons become super useful on vertical and slightly overhanging walls where you need to generate outward force to stay on the wall.
How do you approach undercling holds?
Underclings are holds you grab from underneath, like reaching up under a table edge. The trick is to press your feet hard into the wall and lean back slightly – this helps you engage your core and biceps to maintain the grip. They often appear on overhanging routes and require good body tension. While they might feel insecure at first, underclings can become reliable holds once you get used to the body positioning they require.
What’s a pocket, and how do you choose which fingers to use?
Pockets are holes in the rock or climbing hold that fit anywhere from one to four fingers. The number of fingers you can fit determines how you use it – mono (one finger), two-finger, or three-finger pockets each require different techniques. The choice of fingers often depends on the pocket’s orientation and your next move. Ring and middle fingers tend to be strongest for two-finger pockets, while the middle finger works best for monos.
References
- https://www.kendallcliffs.com/top-7-terms-rock-climbing-holds/
- https://www.blog.madboulder.org/bouldering-terminology/